How to Customize Your Motorcycle on a Budget
Anúncios
Customizing your motorcycle on a budget is a thrilling way to make your bike a true extension of your personality without breaking the bank.
For riders, a motorcycle isn’t just a vehicle—it’s a canvas for self-expression, a symbol of freedom, and a testament to individuality.
But let’s face it: the cost of aftermarket parts, professional labor, and high-end accessories can spiral quickly.
Anúncios
According to a 2024 survey by Motorcycle Industry Council, 68% of riders want to personalize their bikes but cite cost as the primary barrier.
So, how can you transform your ride into a head-turner without draining your savings?
This guide dives into creative, cost-effective strategies to customize your motorcycle on a budget, blending practicality with ingenuity to help you craft a unique ride.
Why Customize Your Motorcycle?
Personalizing a motorcycle goes beyond aesthetics—it’s about enhancing functionality, comfort, and pride in ownership.
A custom bike reflects your style, improves your riding experience, and can even increase its resale value if done thoughtfully.
Think of it like tailoring a suit: off-the-rack works, but a bespoke fit feels like a second skin.
Budget-conscious customization doesn’t mean cutting corners; it’s about smart choices, resourcefulness, and prioritizing impact over expense.
Ready to roll up your sleeves? Let’s explore how to make your bike stand out without emptying your wallet.
Customization can also foster a deeper connection with your motorcycle, as each modification tells a story about your journey as a rider.
Start with a Vision: Plan Your Build
Before you spend a dime, define your customization goals.
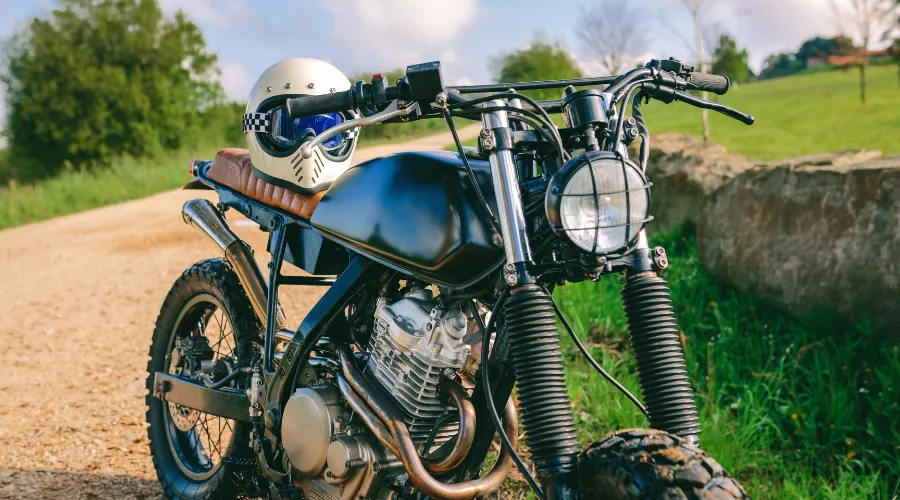
Are you aiming for a retro café racer vibe, a sleek modern look, or a rugged adventure style?
A clear vision prevents impulse buys and ensures every dollar counts.
Create a mood board—digital or physical—with images of bikes, colors, and parts that inspire you.
Sketch out your bike’s current state versus your dream build, noting which areas (paint, handlebars, seats, etc.) need attention.
Planning helps you prioritize high-impact, low-cost changes.
For example, Jake, a 29-year-old mechanic from Colorado, wanted a vintage bobber look for his 2008 Honda Shadow.
Instead of splurging on a full rebuild, he focused on three affordable upgrades: a DIY paint job, second-hand leather saddlebags, and a custom-wrapped exhaust.
His total cost? Under $500, yet his bike turned heads at every local meetup.
A focused plan keeps your budget tight and your creativity sharp.
Table 1: Budget Customization Planning Checklist
| Step | Action | Estimated Cost |
|---|---|---|
| Vision | Create a mood board or sketch | $0 |
| Research | Browse forums, X posts, or local shops for deals | $0–$10 (internet or travel) |
| Prioritize | List 3–5 high-impact changes | $0 |
| Budget | Set a spending cap (e.g., $500) | $0 |
| Timeline | Plan phases (e.g., paint first, accessories later) | $0 |
Having a clear vision not only saves money but also enhances the overall satisfaction of the customization process.
Paint and Graphics: High Impact, Low Cost
A fresh paint job or vinyl wrap can transform your bike’s look for a fraction of the cost of new parts.
Professional paint jobs can run $1,000 or more, but DIY options are wallet-friendly.
Spray paint designed for metal surfaces, like Rust-Oleum’s specialty line, costs $10–$20 per can and can cover a bike’s tank and fenders.
Vinyl wraps, available online for $50–$150, offer bold patterns or matte finishes that rival custom shops.
Practice on scrap metal first to avoid mistakes.
For graphics, consider decals or stencils.
Online marketplaces like Etsy offer custom decals starting at $5, letting you add logos, stripes, or personal designs.
If you’re artistically inclined, hand-paint details using enamel paint for a one-of-a-kind touch.
The key is preparation: sand, prime, and clean surfaces for a professional finish.
A well-executed paint job can make a $2,000 bike look like a $10,000 showpiece.
Additionally, exploring local community workshops can provide access to tools and resources that make painting and graphics more accessible.
+ Street Bikes vs. Dirt Bikes: Which One Is Right for You?
Swap Parts Smartly: Used and Aftermarket Finds
New OEM parts are pricey, but the second-hand market is a goldmine for budget customizers.
Check local salvage yards, eBay, or motorcycle forums like Reddit’s r/motorcycles for used handlebars, mirrors, or seats.
For instance, a set of aftermarket clip-on handlebars can cost $200 new but often sells for $50 used in good condition.
Always inspect parts for wear and compatibility with your bike model.
Aftermarket parts are another budget-friendly option.
Brands like TC Bros or BikeMaster offer affordable alternatives to OEM components, such as foot pegs ($20–$40) or LED turn signals ($15–$30).
Compare prices across platforms and read reviews to avoid low-quality knockoffs.
Pro tip: follow X accounts like @MotoDeals or @CycleGear for flash sales on parts, often slashing prices by 30–50%.
For more insights on finding quality used parts, check out CycleTrader.
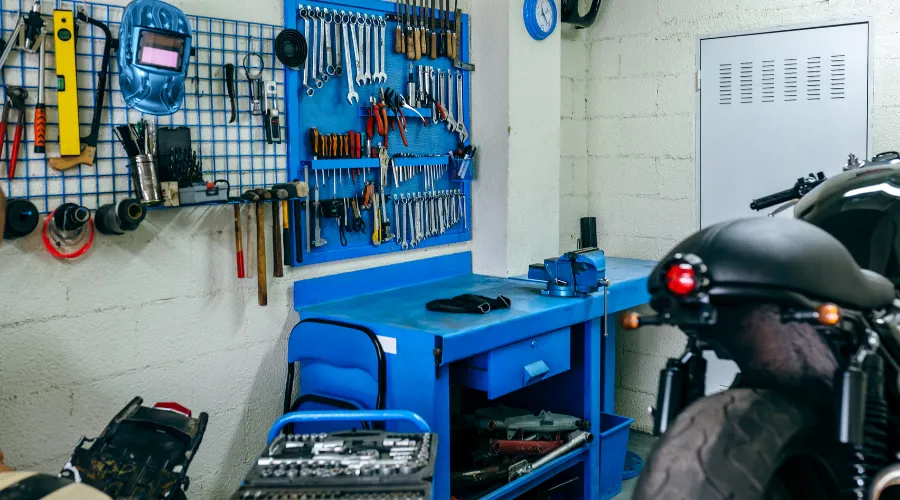
DIY Mods: Unleash Your Inner Craftsman
Why pay a shop when you can customize your motorcycle on a budget with your own hands?
DIY mods are not only cost-effective but also deeply satisfying.
For example, reupholstering a seat with marine-grade vinyl ($10–$20 per yard) and a staple gun can refresh a worn saddle.
YouTube tutorials guide you through the process, from cutting foam to stitching seams.
Another idea: craft custom grips using paracord or leather strips for under $15, adding a rugged, bespoke vibe.
Take Sarah, a graphic designer from Oregon, who transformed her 2015 Yamaha Bolt with DIY mods.
She wrapped her pipes with heat-resistant tape ($12), painted her tank with a $15 stencil kit, and sewed a custom seat cover for $18.
Her total spend was $45, but the result looked like a $500 upgrade.
DIY projects demand time and patience but deliver unmatched value and pride.
Table 2: Cost Comparison of DIY vs. Professional Customization
| Customization | DIY Cost | Professional Cost | Time (DIY) |
|---|---|---|---|
| Paint Job | $20–$150 | $500–$2,000 | 5–10 hours |
| Seat Reupholstery | $10–$30 | $150–$400 | 3–5 hours |
| Exhaust Wrap | $10–$20 | $100–$300 | 1–2 hours |
| Decal Application | $5–$50 | $50–$200 | 1–3 hours |
Embracing DIY not only saves money but also fosters a sense of accomplishment as you see your vision come to life.
Lighting Upgrades: Shine Without Splurging
Lighting is a subtle yet powerful way to customize your motorcycle on a budget.
LED headlight bulbs, starting at $20, improve visibility and give your bike a modern edge.
Accent lighting, like LED strip kits ($10–$30), can highlight your frame or wheels for a custom glow.
Installation is straightforward—most kits are plug-and-play, requiring no wiring expertise.
Check your local laws, as some states restrict colored lights on public roads.
For a unique touch, consider smoked or tinted turn signal lenses ($10–$25) to complement your bike’s color scheme.
These small changes create a cohesive look without the expense of larger mods.
Always prioritize quality—cheap LEDs burn out fast, so opt for brands like Eagle Lights or Kuryakyn with solid reviews.
Upgrading your lighting not only enhances aesthetics but also significantly improves safety during night rides.
Performance Tweaks: Affordable Power Boosts
Customization isn’t just about looks—performance upgrades can enhance your ride’s feel while staying budget-friendly.
Air filter upgrades, like K&N’s reusable filters ($40–$80), improve airflow and add a slight horsepower boost.
Re-jetting a carburetor ($10–$20 for a jet kit) can optimize fuel delivery for better throttle response.
These mods are DIY-friendly with basic tools and online guides.
Exhaust slip-ons are another cost-effective upgrade.
A slip-on muffler ($100–$200) from brands like Vance & Hines adds a deeper growl and minor performance gains without requiring a full exhaust system ($500+).
Check X for rider reviews or local meetups to hear exhausts in person before buying.
Performance tweaks let you feel the difference, not just see it.
Investing in performance upgrades can significantly enhance your riding experience, making each ride more exhilarating.
Community and Collaboration: Tap Into Rider Networks
The motorcycle community is a treasure trove of resources for budget customizers.
Join local riding groups or online forums like The Vintagent or ADVRider to swap parts, share tips, or find discounted services.
Many riders sell barely-used parts at steep discounts or trade skills—say, a paint job for a tune-up.
X is also a great platform to connect with builders; search hashtags like #MotorcycleBuilds or #BudgetBikes for inspiration and deals.
Collaborating with friends can cut costs further.
Host a garage night where you and buddies work on each other’s bikes, pooling tools and expertise.
You might score a free paint tip or a spare part from someone’s stash.
Community-driven customization saves money and builds bonds—why ride alone when you can create together?
Engaging with fellow riders not only enhances your knowledge but also creates lasting friendships through shared experiences.
++ Women in Motorcycling: Breaking Stereotypes
Maintenance as Customization: Keep It Running Right
A well-maintained bike looks and feels custom without extra spending.
Regular cleaning, polishing, and chain maintenance enhance your bike’s appearance and longevity.
A $10 bottle of chrome polish can make old parts gleam like new.
Upgrading to stainless steel bolts ($5–$15) resists rust and adds a polished look.
These small investments prevent costly repairs and keep your bike looking sharp.
Consider this: a neglected bike with faded paint and rusty bolts screams “cheap,” while a clean, well-kept machine exudes pride.
Maintenance is customization in disguise—every polished surface and tight bolt contributes to your bike’s unique character.
Prioritizing regular maintenance can extend the life of your motorcycle and enhance its overall performance.
Budget Pitfalls to Avoid
Customizing your motorcycle on a budget requires discipline.
Avoid these common traps: impulse buys, low-quality parts, and skipping research.
Cheap knockoff parts often fail quickly, costing more in replacements.
Always verify part compatibility with your bike’s make and model.
Don’t overspend on one area—balance aesthetics, performance, and comfort to maximize impact.
Finally, know your skill limits; botched DIY jobs can lead to expensive fixes.
Staying informed and patient can save you money and ensure that your customization journey is enjoyable and rewarding.
Wrapping It Up: Your Bike, Your Way
Customizing your motorcycle on a budget is about creativity, not cash.
From DIY paint jobs to savvy second-hand finds, you can craft a ride that’s uniquely yours without financial strain.
Each mod—whether a $10 decal or a $50 seat—tells your story.
So, what’s stopping you from turning your bike into a rolling masterpiece?
Start small, plan smart, and ride proud.
Your dream bike is closer than you think.
Embrace the journey of customization, and let your motorcycle reflect your unique personality and style.